
22 DIY Grill Station Ideas for a Brilliant Backyard Setup
Backyard grilling should feel relaxed, not like a scramble for plates, tools, and somewhere to set the food. A DIY grill station can turn an awkward patio corner into a practical cooking zone that looks inviting and works for everyday meals or weekend cookouts.
In this collection, you’ll find 22 ideas for creating a more organized grill area, from compact rolling carts and fold-down shelves to sturdy counters, outdoor storage, and simple layout upgrades. Some projects suit a tight budget or a small patio, while others help define a larger backyard kitchen. Before building, check your grill manual for clearance requirements and choose materials made for outdoor conditions. In my experience, a useful landing surface and a clear place for tools often make cooking outside feel easier, even without a full outdoor kitchen. Use these ideas to find a setup that fits your space, budget, and cooking style.
Compact Brick Grill Counter
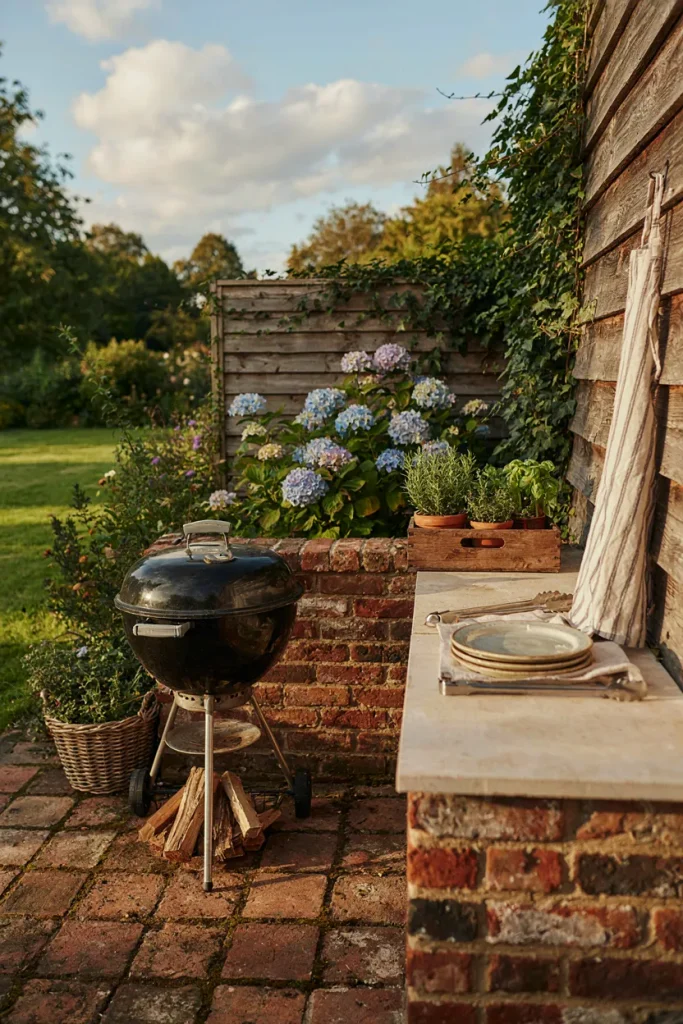
A DIY grill station works better when the grill has a sturdy landing spot for trays, sauces, and plates. Place it on a level, noncombustible surface, then build a short side counter from weather-resistant brick or masonry blocks. Keep the grill’s required clearance from walls and overhead structures.
Top the counter with outdoor-rated stone or concrete pavers that wipe clean after dinner. Open shelves can store metal trays and heat-safe tools, while a small lidded bin hides clutter. Check the grill manual and local rules before building, especially if the project involves gas or electrical connections.
Rolling Outdoor Prep Cart
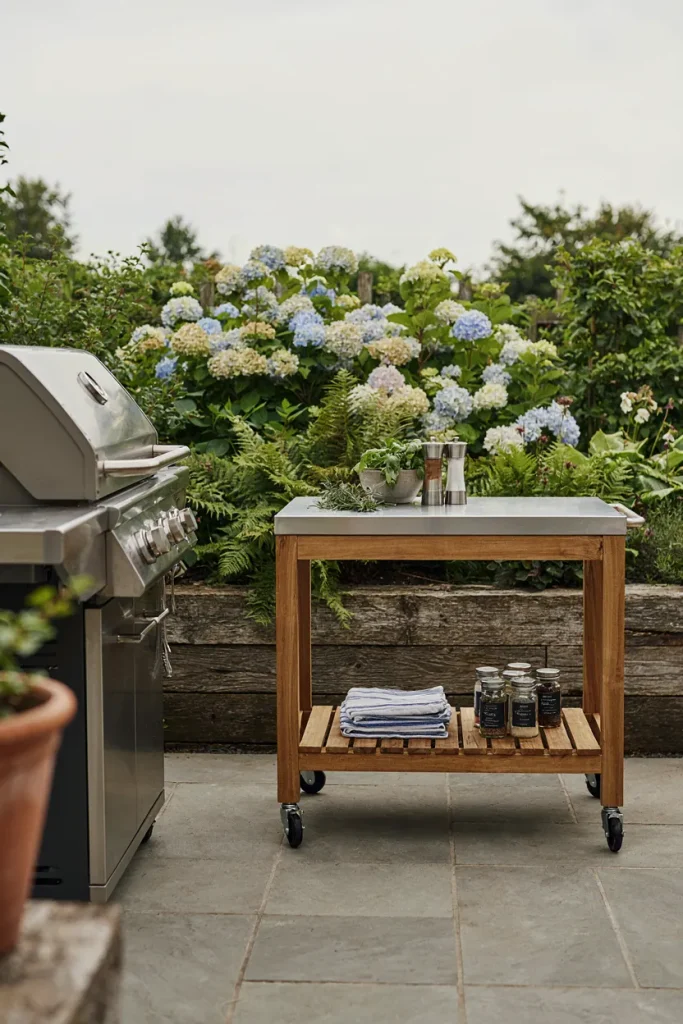
- Give every barbecue tool a home with a slim rolling prep cart that moves wherever you need it.
- Build the frame from exterior-rated lumber and seal it with a weather-resistant finish to protect against moisture.
- Choose a stainless steel or outdoor-rated worktop that resists stains and cleans easily after cooking.
- Fit locking casters rated for the cart’s fully loaded weight to keep the surface stable during food preparation.
- Store the cart outside the grill manufacturer’s required clearance, and never use a wooden cart as a stand for a hot grill.
A rolling cart is especially useful on small patios because it can serve as a prep table during cooking and roll into a sheltered storage spot afterward. Keep knives and cleaning supplies in a closed container, and bring the cart indoors during storms or freezing weather to protect the finish.
Also View: 23 Stunning Deck Planter Ideas for a Stylish Outdoor Retreat
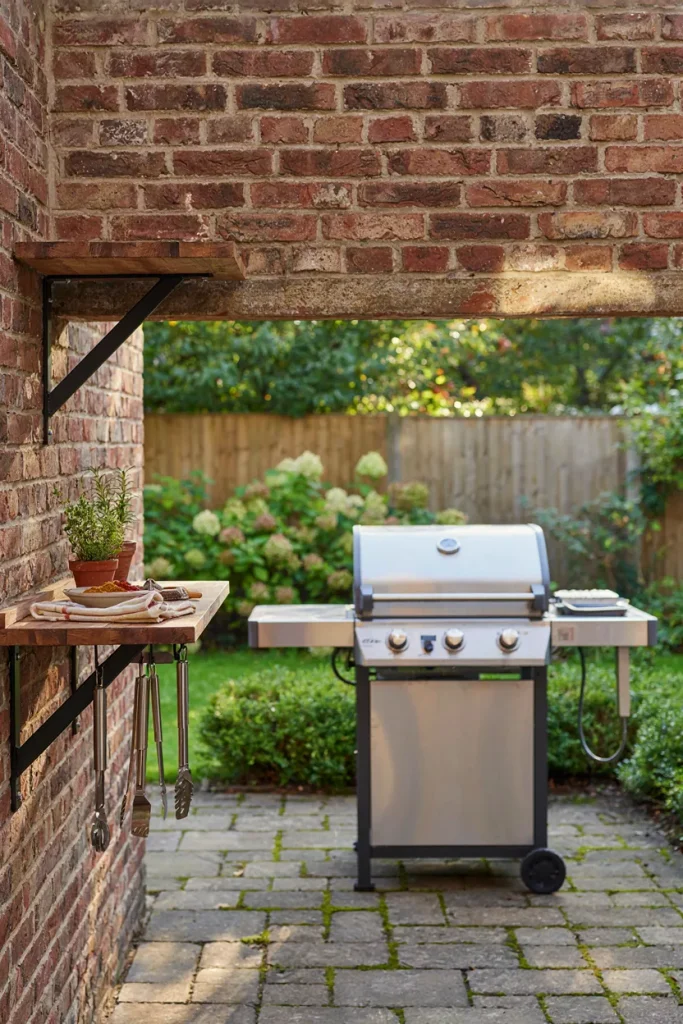
Fold-Down Prep Shelf
Quick Tip:
Save precious patio space with a fold-down shelf, but mount it to structural studs or sound masonry, not thin siding. Check the bracket load rating and keep the shelf outside the grill manufacturer’s required clearance.
Choose exterior-rated brackets and a top that tolerates moisture, such as sealed hardwood or stainless steel. Sand every edge and round the corners so sleeves and aprons do not snag. When folded down, the shelf should latch securely and leave a clear path around the cooking area.
Concrete Block Island

BEFORE: A freestanding grill sits alone on the patio, with no dedicated surface for food preparation. Plates and condiments end up scattered across outdoor chairs or a nearby table.
AFTER: A concrete block island creates a defined cooking zone with a durable worktop and useful storage underneath. The arrangement feels organized without requiring a complicated carpentry project.
Choose blocks rated for outdoor use and build on a stable, level base. Secure the structure appropriately, and select a countertop rated for outdoor conditions. Keep combustible items away from the grill and follow the manufacturer’s clearance requirements. Open cubbies are useful for storing sturdy trays, grill brushes, and weather-resistant accessories.
Repurposed Potting Bench
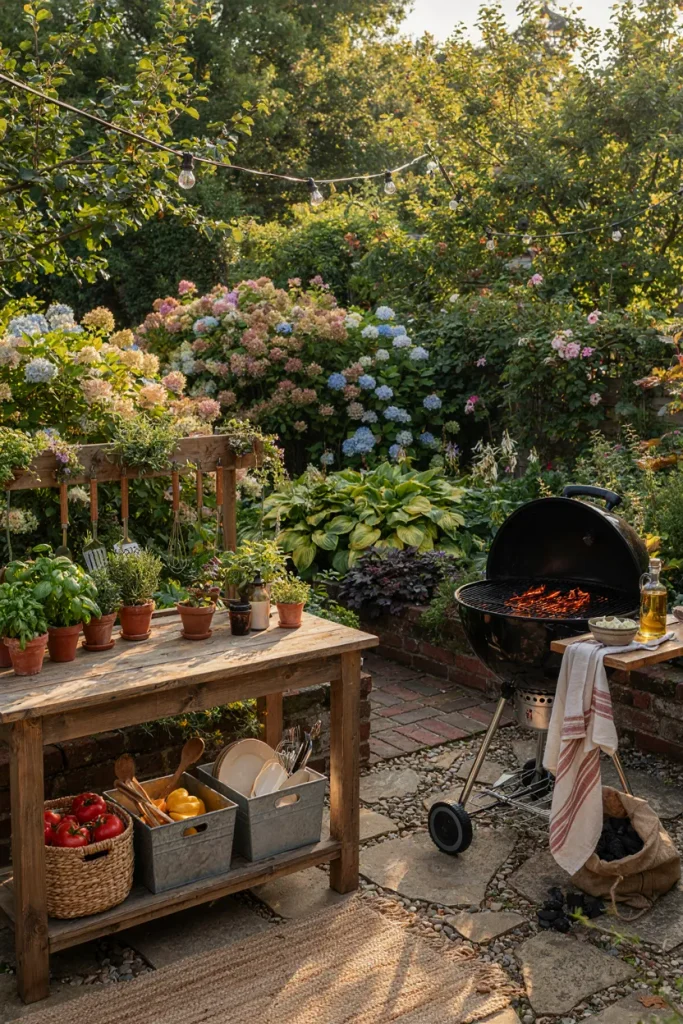
- Inspect the bench: Choose a sturdy structure without rot, loose joints, or cracked boards. Remove old soil, fertilizer residue, and gardening chemicals before repurposing it.
- Prepare the surface: Sand rough edges and apply an exterior-rated finish suitable for a food preparation area. Add a removable food-safe cutting board for chopping ingredients.
- Organize the storage: Place clean trays and serving dishes on the lower shelf. Use removable containers to keep utensils protected from dust and insects.
- Position it safely: Set the bench on stable ground outside the grill’s required clearance zone, away from direct heat and open flames.
A repurposed potting bench brings character to a backyard without the expense of building custom cabinetry. Look for a model with a broad work surface and useful shelving. Keep raw meat, clean plates, and garden supplies separate, and bring removable accessories indoors when the station is not in use.
Stone and Steel Worktop
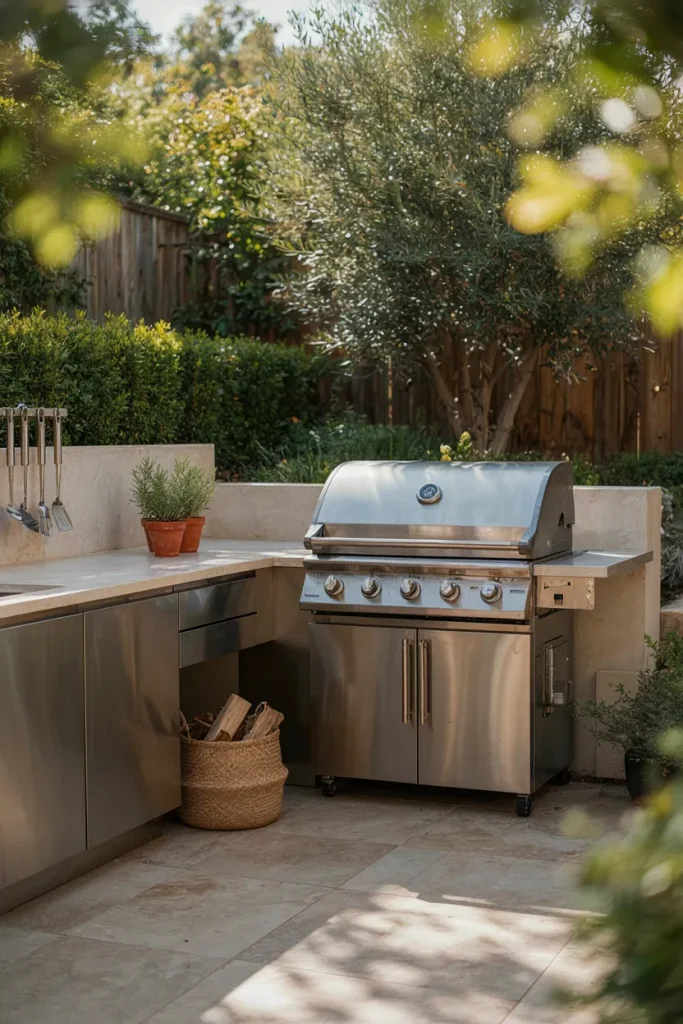
| Feature | Option A: Natural Stone | Option B: Stainless Steel |
| Appearance | Textured, timeless, and earthy | Sleek, modern, and professional |
| Maintenance | Depends on the stone and its finish; some require sealing | Generally easy to wipe clean |
| Durability | Varies by stone type and installation | Resists corrosion when the appropriate grade is selected |
| Best suited for | Rustic or traditional outdoor kitchens | Contemporary and minimalist grill areas |
Your worktop affects both the appearance and everyday usability of an outdoor cooking area. Choose stone specifically rated for outdoor exposure, or select stainless steel suited to your climate. Provide proper support beneath the surface, allow for drainage, and clean food preparation areas after each use to prevent grease buildup and staining.
Pallet Wood Prep Station

DO:
- Choose sturdy, heat-treated or otherwise suitable lumber with no chemical contamination.
- Sand rough edges and seal the wood with an exterior-rated finish.
- Add a removable cutting board and washable storage containers.
- Secure the table on level ground to prevent wobbling.
DON’T:
- Don’t place the wooden station directly beside hot grill surfaces.
- Don’t use pallets with unknown chemical treatments or spills.
- Don’t store propane cylinders inside enclosed wooden compartments.
- Don’t leave food exposed to insects or outdoor debris.
A pallet wood prep station gives your backyard a relaxed, farmhouse-inspired look without requiring expensive custom cabinetry. Keep the table dedicated to food preparation and serving rather than supporting the grill itself. With a few hooks and organized containers, you’ll have a practical workspace that feels intentional and tidy.
Compacted Gravel Grill Pad
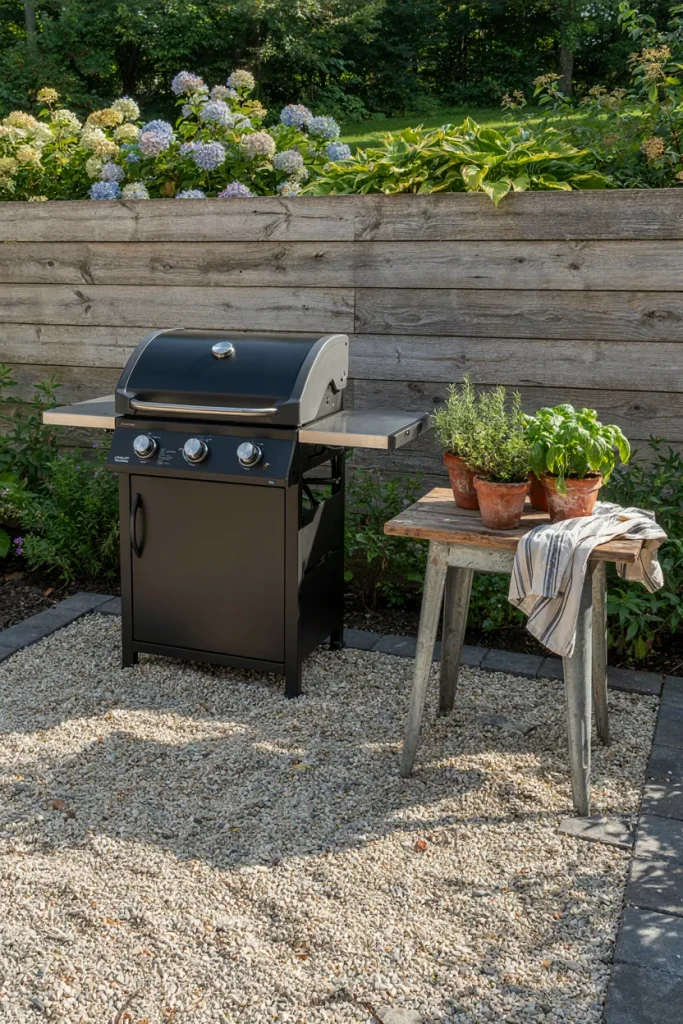
Cost: Low to moderate, depending on the gravel and edging selected.
Time: Typically one weekend for a small, straightforward pad.
Skill Level: Beginner to intermediate.
Best For: Backyards where grass or uneven soil makes grilling awkward.
A dedicated gravel pad creates a defined cooking area without the expense of pouring a concrete slab. Remove soft topsoil, prepare a stable base, and compact the layers properly to reduce sinking. Choose angular gravel that locks together underfoot, add secure edging, and keep the surface level enough for stable equipment. Check the grill manufacturer’s requirements before installation.
Built-In Herb Planter
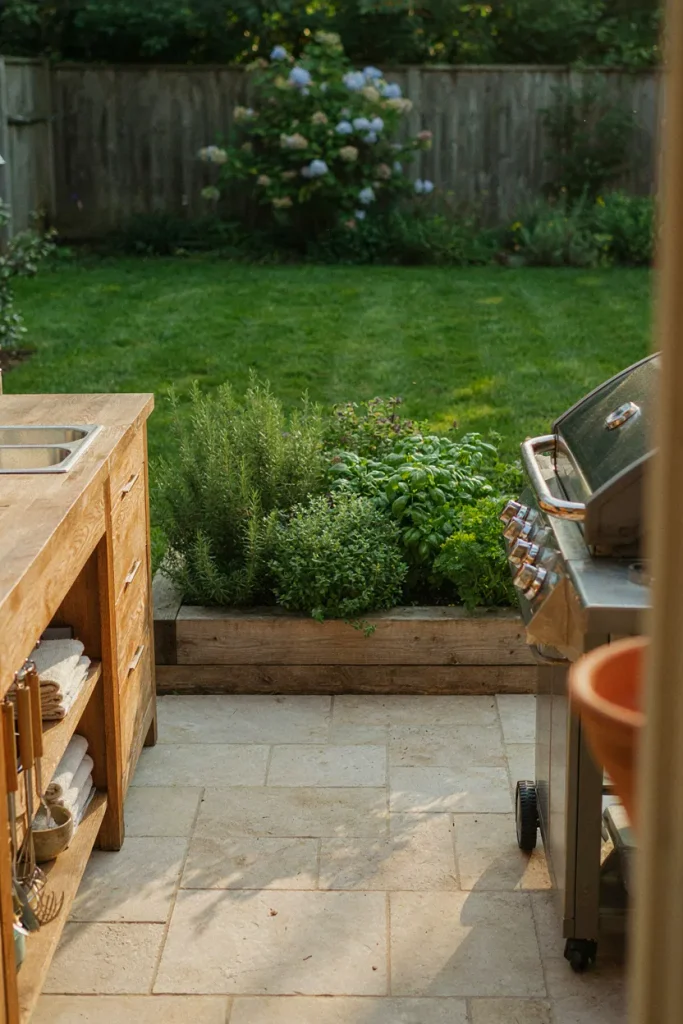
Fresh herbs within easy reach make backyard cooking feel more convenient and personal. Position a small planter near your preparation counter, with rosemary, thyme, and parsley in separate sections. Use weather-resistant materials and drainage holes so roots stay healthy after watering or rain.
I’ve noticed that keeping herbs close to the cooking area makes them easier to use regularly. Place the planter where it receives suitable sunlight without blocking walkways or sitting in the grill’s heat zone. Grow mint in its own container because it spreads quickly, and harvest only what you need for each meal.
Outdoor Sink Station

- Choose a suitable sink: A compact stainless steel basin is practical for rinsing vegetables and washing hands during outdoor cooking.
- Plan the water supply: Use plumbing designed for outdoor conditions, installed according to local requirements.
- Include proper drainage: Connect the sink to an approved drainage system rather than allowing wastewater to pool in the yard.
- Select weather-resistant materials: Stainless steel, exterior-rated cabinetry, and durable countertops handle outdoor exposure better than untreated materials.
- Protect the plumbing: Insulate or disconnect seasonal water lines before freezing temperatures arrive, following local plumbing guidance.
A sink can make your DIY grill station much more convenient, especially when preparing meals for a crowd. Position it near the preparation counter but outside the grill’s required clearance zone. Keep handwashing supplies separate from food preparation tools, and make sure the work area stays easy to clean.
Weatherproof Storage Cabinet
Quick Tip:
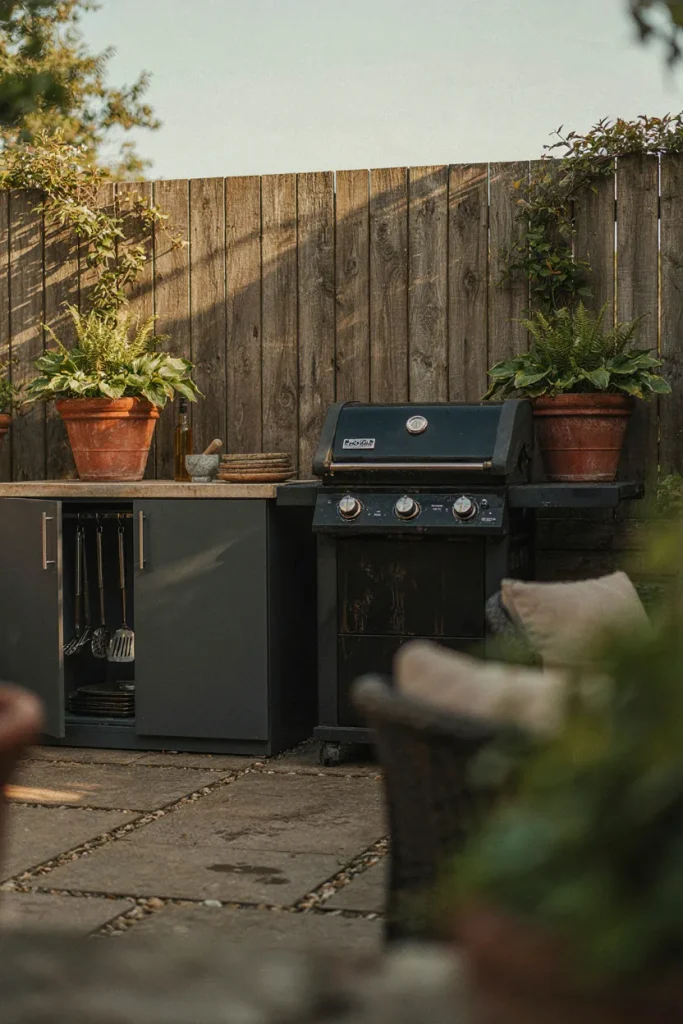
Choose a cabinet specifically rated for outdoor use, with moisture-resistant construction, rust-resistant hardware, and doors that close securely. Raise it slightly above standing water and provide ventilation where needed to prevent trapped moisture.
Organized storage keeps your barbecue area looking tidy even when it is not in use. Reserve one shelf for clean cooking tools, another for serving dishes, and a separate container for cleaning supplies. Store charcoal and other combustible materials according to their packaging instructions, away from ignition sources and hot surfaces.
Pergola-Covered Grill Zone

BEFORE: The grill sits exposed in an open yard, with little definition between the cooking area and the rest of the patio. Strong sunlight can make long cooking sessions uncomfortable, while scattered furniture leaves the space feeling disorganized.
AFTER: A thoughtfully planned pergola defines the grilling zone and gives the backyard a more cohesive layout. Properly positioned seating and a nearby preparation surface create a convenient place to cook, serve, and gather.
Choose a pergola designed for outdoor conditions and anchor it securely according to its installation instructions. Before adding a roof, fabric canopy, or climbing plants, confirm that the design meets the grill manufacturer’s clearance and ventilation requirements. Never assume an open-sided pergola makes grilling safe beneath combustible overhead materials.
Outdoor Tile Counter
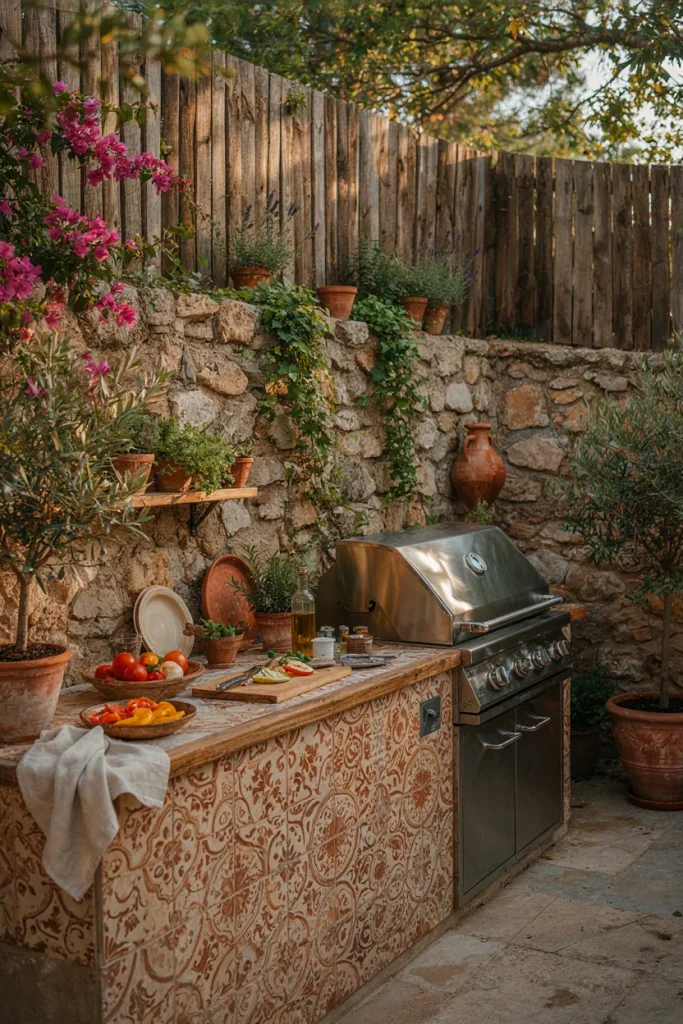
- Build a sturdy base: Use an outdoor-rated masonry or cement-board system designed to support tiled countertops. Follow the manufacturer’s installation instructions.
- Choose suitable tiles: Select frost-resistant porcelain or other tiles rated for outdoor use. A matte finish helps create a natural, understated appearance.
- Apply compatible materials: Use exterior-rated mortar, grout, and waterproofing products suitable for the substrate and local climate.
- Finish the edges: Install suitable edge trim and seal joints where required to help protect the countertop from moisture.
- Organize the surface: Keep frequently used seasonings and serving plates in removable containers so the counter stays easy to clean.
A tiled countertop gives a backyard cooking area a custom look without requiring a solid stone slab. Neutral tiles complement traditional gardens, while patterned designs add character to simple patios. Choose materials that can withstand your local weather, and inspect grout joints periodically for cracks or signs of water damage.
Salvaged Cabinet Base
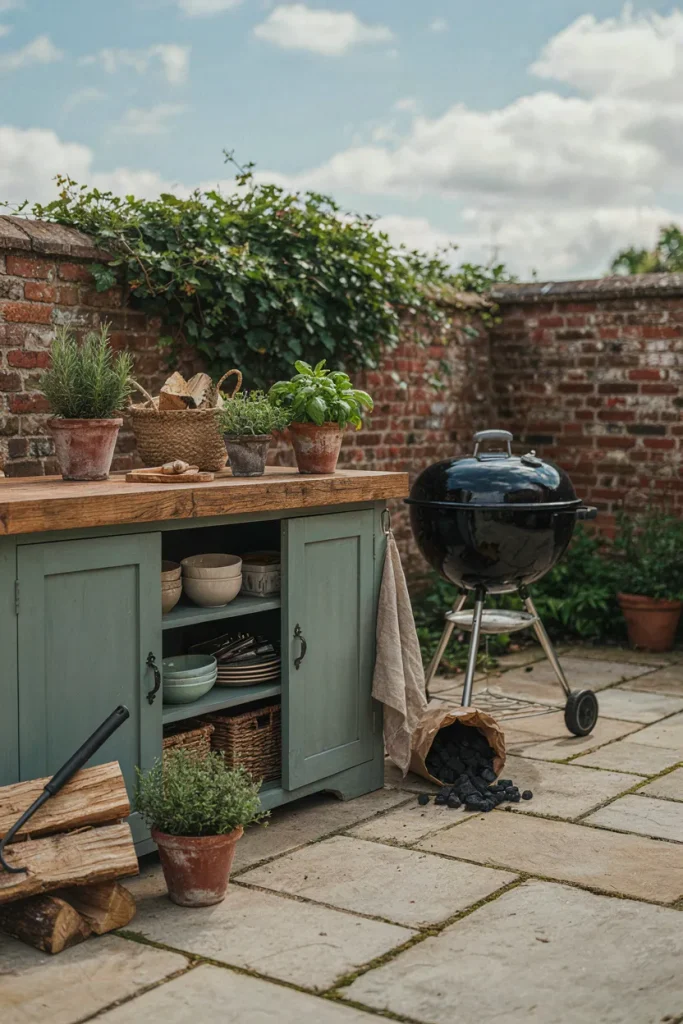
| Feature | Option A: Repurposed Cabinet | Option B: New Outdoor Cabinet |
| Initial cost | Often lower if you already own one | Usually higher |
| Weather resistance | Depends on original materials and restoration | Available with purpose-built outdoor protection |
| Customization | Paint, handles, and shelving can be changed | Sizes and finishes vary by product |
| Maintenance | May need frequent refinishing | Depends on material and exposure |
A salvaged cabinet can provide useful storage for barbecue tools without the cost of custom-built cabinetry. Inspect it for water damage, pests, and structural weakness before starting. Replace unsuitable hardware, apply an appropriate exterior finish, and protect the interior from moisture. Keep combustible cabinets outside the grill’s specified clearance area.
Freestanding Metal Shelf
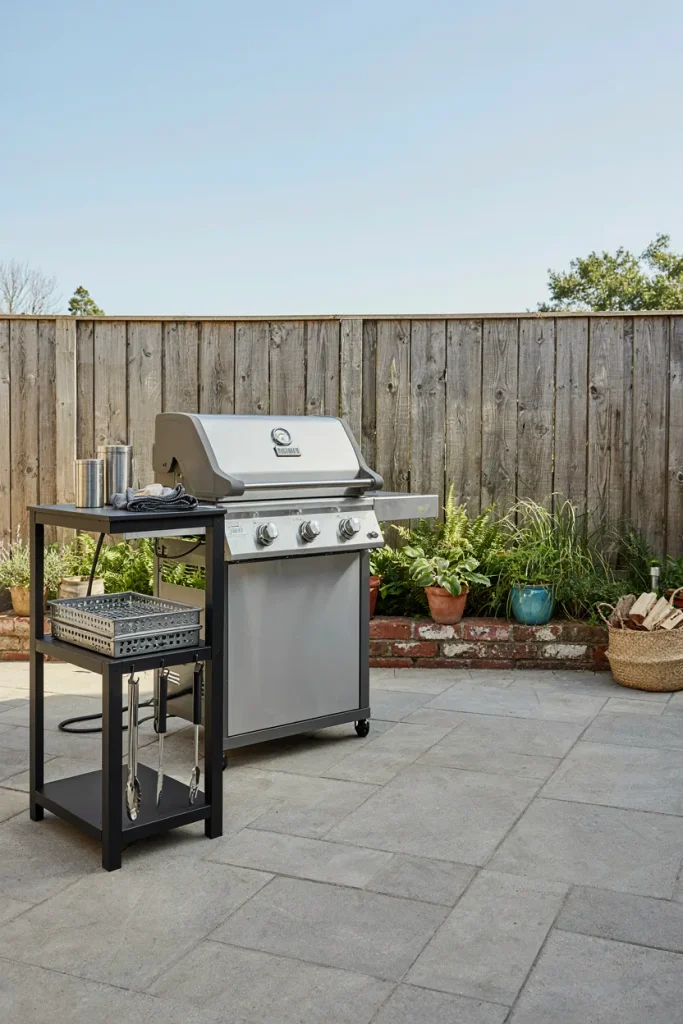
DO:
- Select a rust-resistant metal shelf rated for outdoor conditions.
- Check the manufacturer’s weight limits before loading the shelves.
- Secure the unit against tipping, especially on exposed patios.
- Use removable, washable bins to keep small accessories organized.
DON’T:
- Don’t place the shelf where flames or hot surfaces can reach it.
- Don’t overload the top shelf with heavy cookware.
- Don’t leave sharp tools exposed to children or pets.
- Don’t store propane cylinders inside an enclosed shelf unit.
A freestanding metal shelf is a practical choice when you need extra storage without building a permanent structure. Choose adjustable shelves to accommodate tall sauce bottles and bulky trays. Keep food-contact accessories clean and dry, and move the unit to a sheltered location during severe weather when practical.
L-Shaped Grill Counter
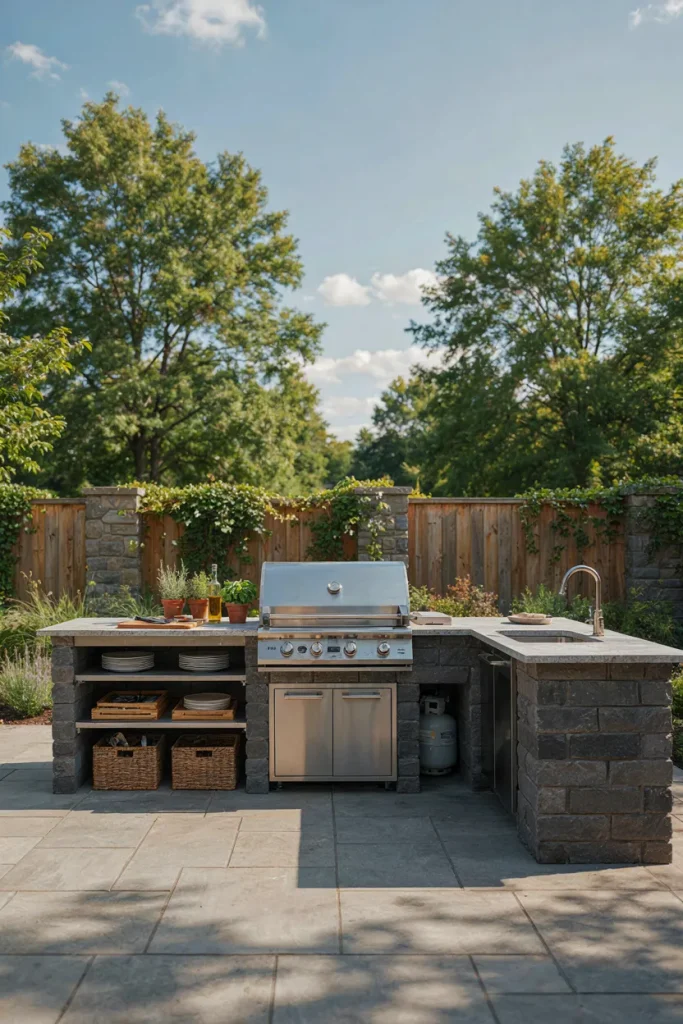
Cost: Moderate to high, depending on materials and dimensions.
Skill Level: Intermediate.
Best For: Medium-sized patios and backyard corners.
Main Benefit: Separates cooking, preparation, and serving areas.
An L-shaped counter makes a backyard cooking area feel organized because each surface has a clear purpose. Reserve one side for food preparation and the other for serving dishes, sauces, and clean utensils. Keep the grill positioned according to its installation requirements, with enough room for ventilation and safe movement around the cooking zone.
Before construction, measure the available patio space and mark the proposed layout with masking tape. This simple step helps reveal cramped corners and blocked walkways before you spend money on materials. Choose weather-resistant countertops and a stable base, and leave accessible space for maintenance if your grill uses gas connections.
Vertical Utensil Rail
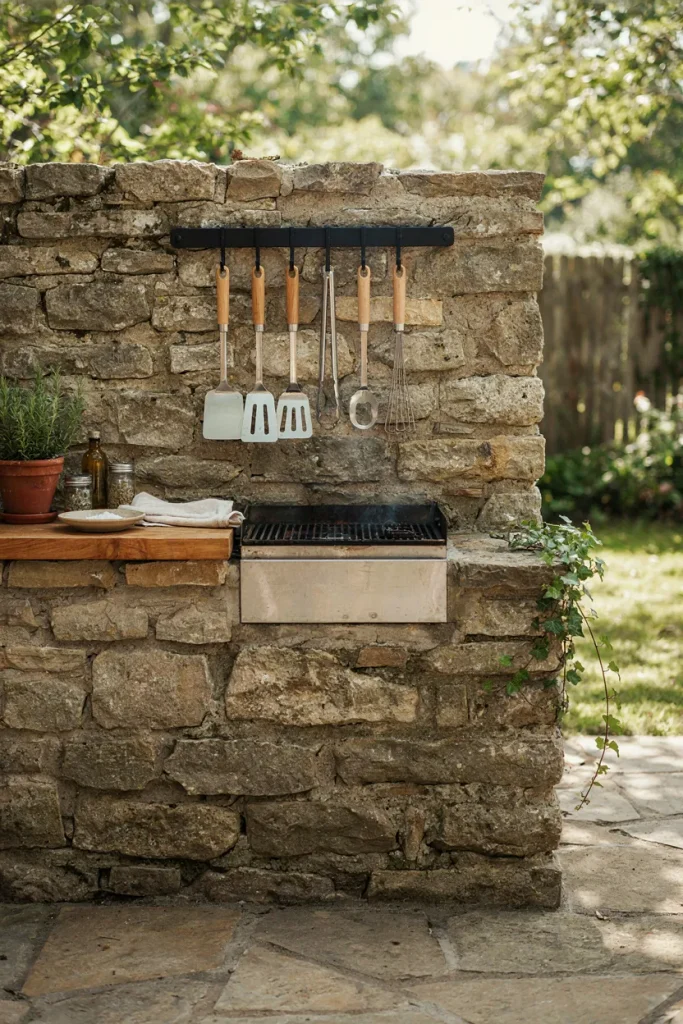
A well-organized utensil rail keeps frequently used tools visible and easy to reach without covering your preparation counter. Mount a corrosion-resistant rail on a suitable wall or freestanding support, away from direct heat and the grill manufacturer’s required clearance zone.
Choose hooks that hold each tool securely, and leave enough space between items so handles do not overlap. Keep cooking utensils separate from cleaning brushes, especially after the grill has been used. In rainy climates, select weather-resistant hardware and bring wooden-handled tools indoors to prevent premature wear.
Built-In Trash Drawer
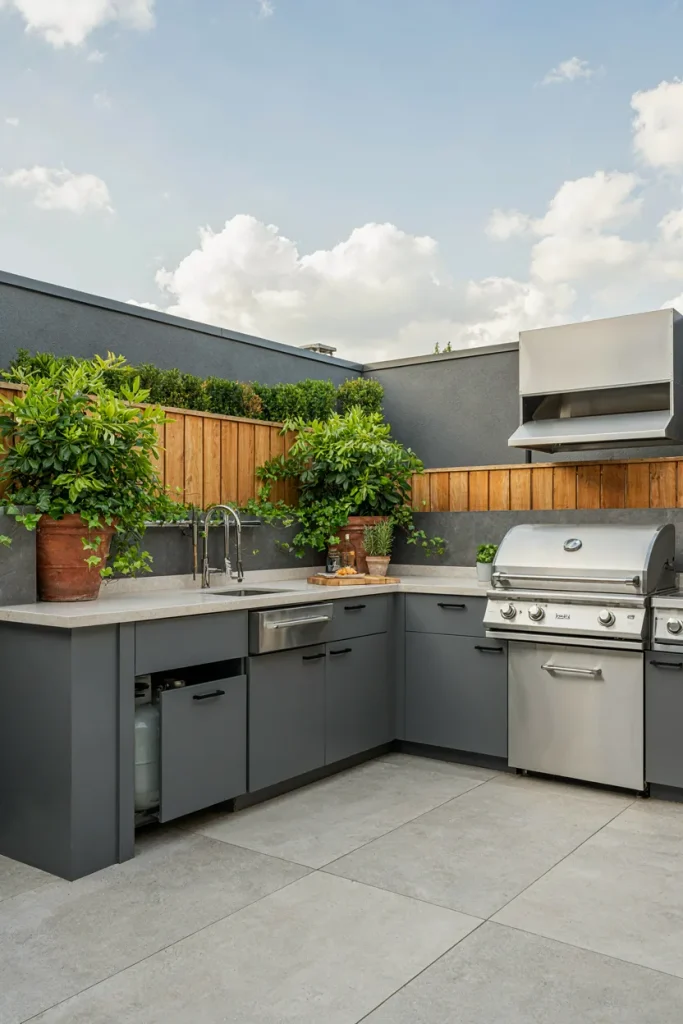
- Choose a suitable cabinet: Select an outdoor-rated base with enough room for a removable waste bin and its sliding mechanism.
- Install sturdy hardware: Use corrosion-resistant drawer slides rated for the bin’s weight when full.
- Make cleaning simple: Choose a removable plastic or stainless steel bin that can be washed easily.
- Control odors: Use a close-fitting lid and empty food waste regularly, especially during warm weather.
- Keep waste separate: Provide another container for recyclables if your household regularly hosts backyard gatherings.
A built-in trash drawer keeps food scraps and packaging out of sight while you prepare meals. Position it near the preparation counter but away from direct heat, and ensure the drawer opens fully without blocking the walkway. A removable bin makes cleanup faster after a barbecue, while a secure closure helps discourage insects and animals.
Dedicated Beverage Cooler
Quick Tip:
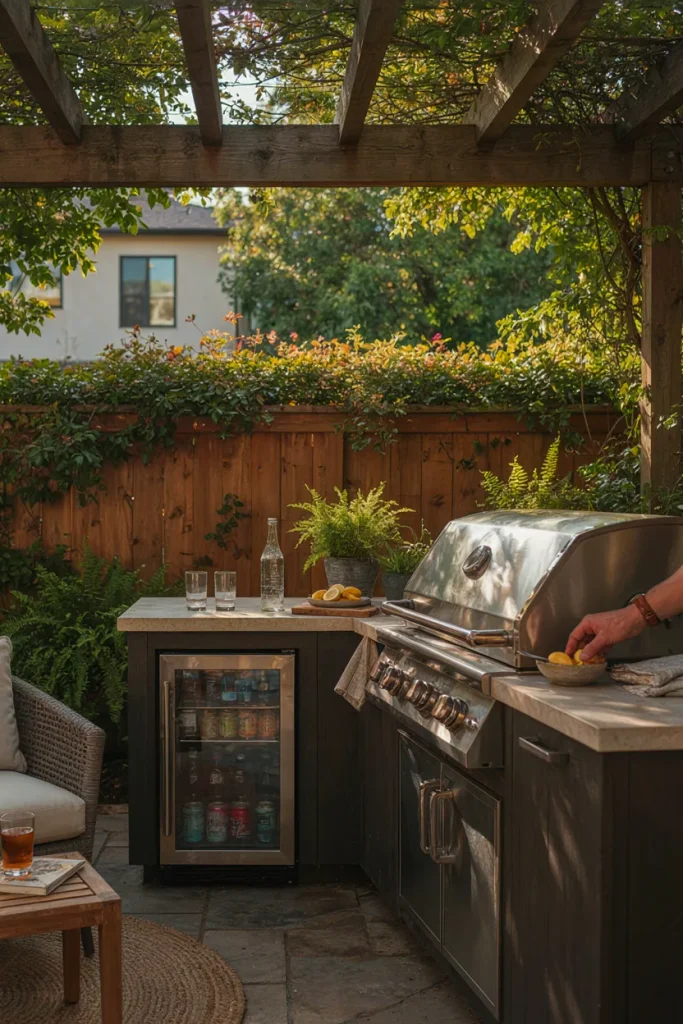
Choose an outdoor-rated beverage cooler designed for your local climate, and check its ventilation requirements before installing it inside cabinetry. Keep drinks chilled without placing the cooler near direct heat or blocking the grill’s required clearance.
A dedicated cooler keeps refreshments close while freeing your kitchen refrigerator during backyard gatherings. Add a small tray for glasses and a separate container for ice to make serving easier. If a built-in model exceeds your budget, a weather-resistant portable cooler tucked beneath a separate serving counter can provide similar convenience.
Decorative Privacy Screens
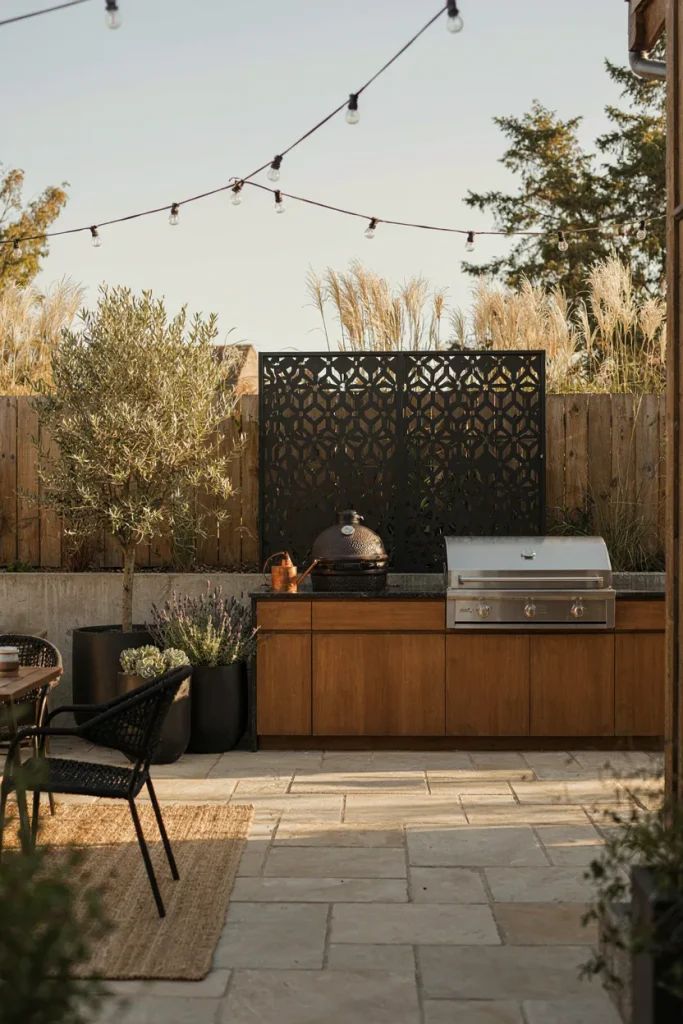
BEFORE: The grill and preparation area feel exposed to neighboring windows or an untidy section of the yard. There is little visual separation between the cooking zone and the rest of the outdoor space.
AFTER: A carefully positioned privacy screen creates a defined backdrop and makes the cooking area feel more intentional. Decorative cutouts allow airflow and light to pass through while adding texture to the patio.
Choose a weather-resistant screen made from powder-coated metal or exterior-rated timber. Anchor it securely against wind, and check local rules before attaching it to a fence or building. Keep the screen outside the grill’s required clearance zone, especially if it contains combustible materials. Tall planters can soften the appearance without enclosing the cooking area.
Modular Paver Island
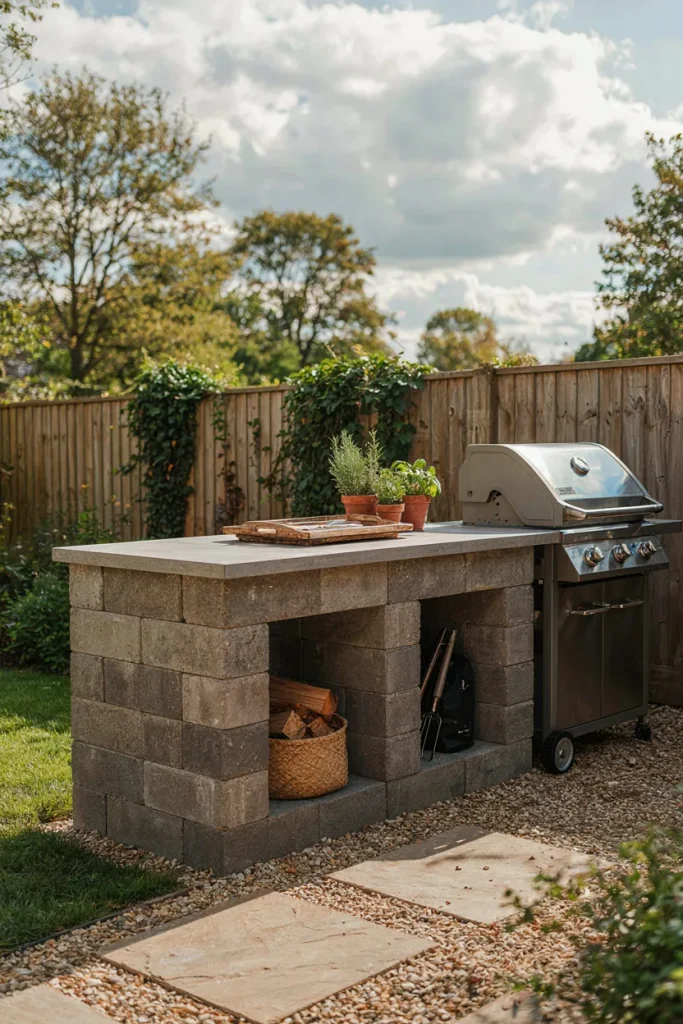
- Measure the footprint: Mark the proposed island dimensions on the patio, leaving enough room for walkways, food preparation, and grill maintenance.
- Prepare the foundation: Create a stable, level base suited to the island’s weight and local ground conditions.
- Build the structure: Assemble compatible masonry units according to their installation instructions, securing them where required.
- Install the countertop: Choose an outdoor-rated surface with adequate support and a finish that is easy to clean.
- Organize the storage: Use open niches for sturdy trays and weather-resistant accessories, keeping combustible supplies away from heat.
Modular pavers make it easier to create a customized cooking area without building every component from scratch. Choose colors that complement your patio and repeat the same materials in nearby planters for a cohesive look. Before adding a heavy countertop or built-in appliance, verify load capacity, stability, and the manufacturer’s installation requirements.
Reclaimed Wood Serving Bar

Quick Tip:
Choose reclaimed wood with a known history and no chemical contamination, then sand rough edges and apply an exterior-rated finish. Keep the serving bar outside the grill’s required clearance zone, and use a removable food-safe board for direct food preparation.
A reclaimed wood bar gives your outdoor cooking area character while providing space for plates, condiments, and freshly prepared sides. Combine different wood tones for a rustic appearance, or use a consistent stain for a cleaner finish. Store delicate serving accessories indoors when not in use to protect them from moisture and insects.
CONCLUSION
Creating a backyard cooking area you love doesn’t require a huge budget or a complete outdoor renovation. The right DIY grill station can help you organize your tools, make meal preparation easier, and create a welcoming spot for family dinners and weekend gatherings. Start with one practical improvement, such as a rolling prep cart, a sturdy countertop, or weatherproof storage, then build on it as your needs change. Save this article on Pinterest so you can revisit your favorite ideas when you’re ready to get started. Share it with friends who love outdoor cooking, and enjoy making your backyard work better for you!